Overview
This page will show you how to setup the Cyberhive Gatekeeper solution on your Windows device. Supported operating systems:
- Windows 10
Requirements
To complete this guide you will need the following:
Gatekeeper Installation
- Provisioning URL, E.g.: provisionX.example.com
- Provisioning Username
- Provisioning Password
- Certificate Password
- Endpoint Address
If you don't have these details to hand, get in touch!
Device
- The ability to access the device as an administrator
Getting Started
Start by accessing your provisioning URL; you will be prompted for a username and password. Use the provisioning username and password supplied. This will take you through to a certificate selection screen:
Index of /

Name                                        Last modified       Size    Description
EXAM_Certificate_Authority_Certificate.pem  2020-06-09 12:16    1.7K
MyCertificate.p12                           2020-06-09 12:16    1.6K

Apache/2.4.29 (Ubuntu) Server at provision1.example.com Port 443
First, download the Certificate Authority certificate. This will be the only .pem file, with a name that looks like EXAM_Certificate_Authority_Certificate.pem. Then download the certificate (a .p12 file) related to the device. The name of this certificate depends on the information provided to us, and is usually a device serial number.
Certificate Installation
Create a directory in the root of your disk drive, for example: C:\temp, and place the downloaded certificates into this directory.
Next, open a 'Command Prompt' window as administrator:

Navigate into the newly created temp directory, and start a powershell session by typing cd C:\temp and then powershell
Microsoft Windows [Version 10.0.18363.836]
(c) 2019 Microsoft Corporation. All rights reserved.

C:\Windows\system32>cd C:\temp

C:\temp>powershell
Windows PowerShell
Copyright (C) Microsoft Corporation. All rights reserved.

Try the new cross-platform PowerShell https://aka.ms/pscore6

PS C:\temp>
Now import the certificates:
Import-Certificate -FilePath EXAM_Certificate_Authority_Certificate.pem -CertStoreLocation Cert:\LocalMachine\Root
Import-PfxCertificate -FilePath MyCertificate.p12 -CertStoreLocation Cert:\LocalMachine\My -Password (ConvertTo-SecureString -String "<certificate password>" -AsPlainText -Force)
VPN Profile Installation
In the same window, enter the following:
Add-VpnConnection -Name "< endpoint address >" -ServerAddress "< endpoint address >" -TunnelType "ikev2" -EncryptionLevel "Required" -AuthenticationMethod MachineCertificate -AllUserConnection -RememberCredential -PassThru
This will setup the VPN connection profile, then you configure the encryption settings, enter:
Set-VpnConnectionIPsecConfiguration -Name "< endpoint address >" -AuthenticationTransformConstants GCMAES256 -CipherTransformConstants GCMAES256 -EncryptionMethod AES256 -IntegrityCheckMethod SHA384 -PfsGroup PFS24 -DHGroup ECP384 -PassThru -Force
This will configure the VPN profile to use specific encryption settings. Finally, enter the following to enable stronger encryption on windows:
reg add HKLM\System\CurrentControlSet\Services\Rasman\Parameters /v NegotiateDH2048_AES256 /t REG_DWORD /d 1 /f
Connect
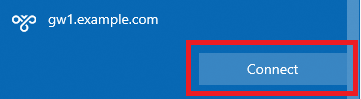
Your windows device should now be successfully setup to connect to your Gatekeeper VPN! To connect to your VPN, go to your network selection menu in the bottom right hand corner of your screen:

Locate your newly created VPN profile in the list and press Connect. Your device will then establish a connection to the VPN Server and display CONNECTED once complete.
Setup Autoconnect Script (Optional)
If you would like the VPN connection to automatically connect on startup then please follow these additional instructions. On your provisioning server, you will find a powershell script called VPN_Force_Connect.ps1. Take this script and place it in the public user directory C:\Users\Public\VPN_Force_Connect.ps1.
Once the file is in-place, download VPN_Autoconnect_Shortcut.ps1 and right-click Run with PowerShell. Reboot the machine and your system should now automatically connect to the VPN.